Overview :
Events are the occurrence that has significance for the management of IT infrastructure. Event Management checks the health of Business Services and responds appropriately to any issue that arrives. It also provides event and alert analysis to ensure the continuity of Business service performance.
Event Management can manage Discovered business services, Technical services, Manual services and Alert groups.
ServiceNow does not have its own monitoring tool. Therefore, we have to integrate it with external monitoring tool to monitors alerts.
Event Management receives external events from external monitoring tool and generates alerts based on Event rules and Alert action rules. These events are sent directly to the instance using MID server, email server, script, SNMP trap or web services API.
The below is the list of connectors provided by ServiceNow which generates the events and send that event to ServiceNow. In ServiceNow, these events are processed and send to external monitoring tool which is known as listeners.
Available Connectors:
HPOM, Hyperic, IBM Netcool, NagiosXI, OMi, SCOM, SolarWinds, vRealize, Zabbix.
Available Listeners:
AWS, Azure, BMC TrueSight, SNMP traps, Email, Oracle Enterprise Manager trap collection.
Now let’s discuss about Event Rules and Alert Action Rule.
Event Rule:
Event rules are the rules which are applied on the events which are coming from external tools. On that event, one can write Event rules which are used to generate the alerts used for tracking and remediation.
When events from monitoring tool matches the condition as specified in event filter, it will generate the alert or ignore the alert as per the configuration of Event Rule.
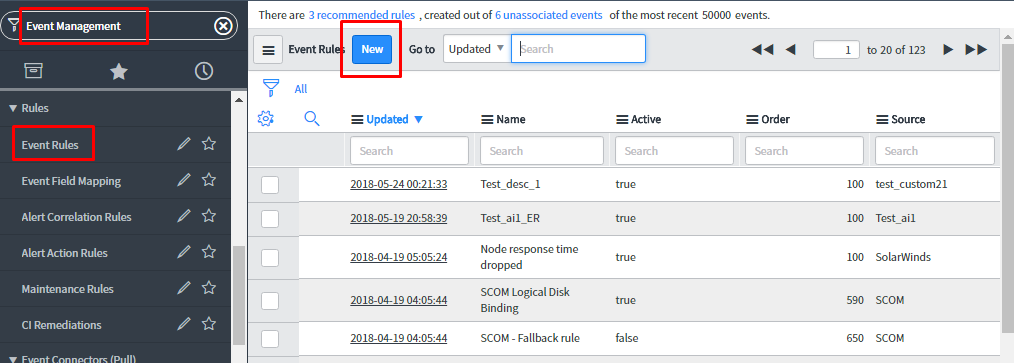
Navigate to Event Management > Rules > Event Rules.
To create Event rule, click on ‘New’.
Use the event rule designer to create and configure event rule.
Let’s, go through these tabs.
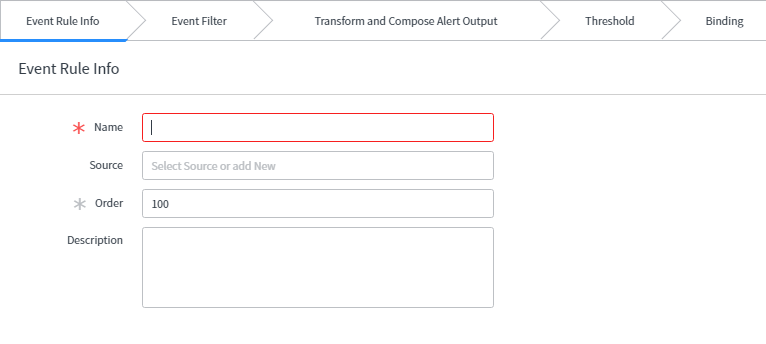
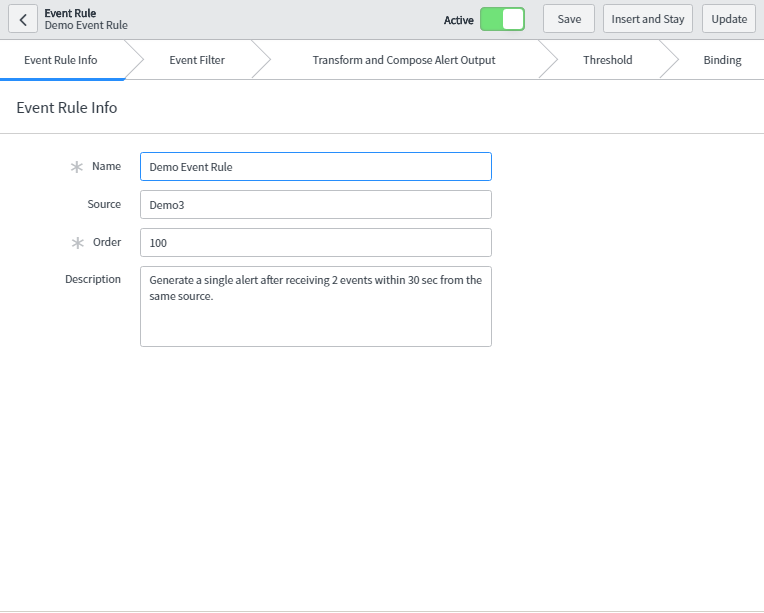
- Event Rule Info:
- Name: Specify the unique name of the event rule.
- Source: Name of the source from where this event came.
- Order: Execution order of the event rule.
- Description: Additional information regarding the event rule.
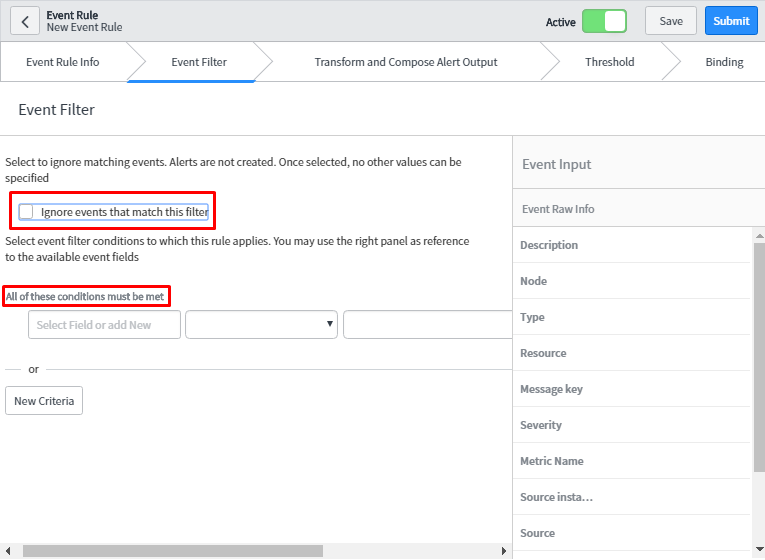
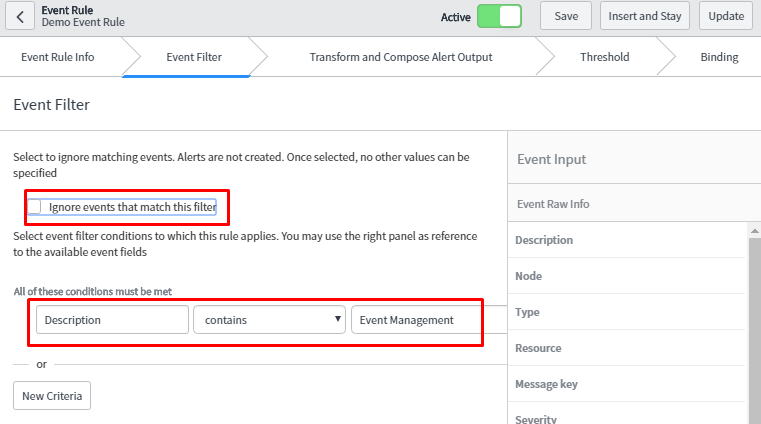
- Event Filter: In this tab, one has to specify the condition. If this condition matches the events generating from external monitoring tool, Alert will be generated provided the checkbox is unchecked else, it will ignore those events.In Condition Builder, one can specify different conditions on the event fields to restrict which event these rules will apply to.
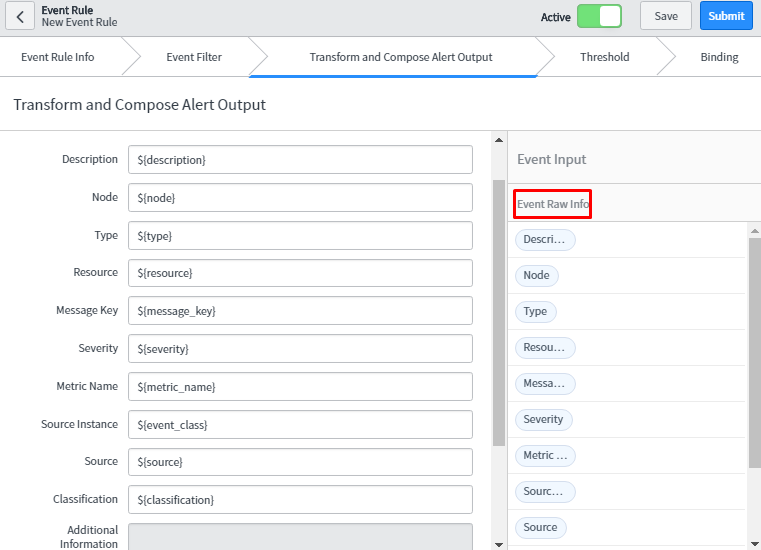
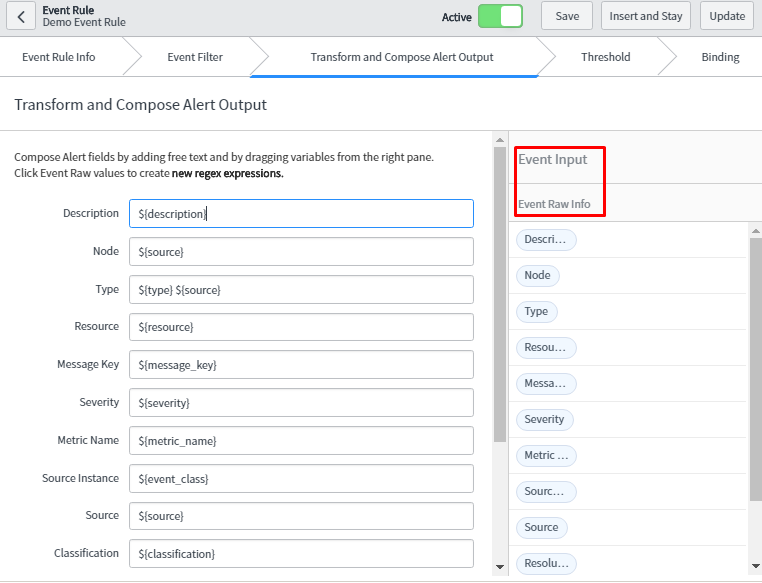
- Transform and Compose Alert Output: One can customize the alert field from this tab as per the need of the organization. Whatever information which is under the Event Raw Info are event fields. These field fetch dynamic values from event table and update the left pane fields with that value which will be seen in alert table.
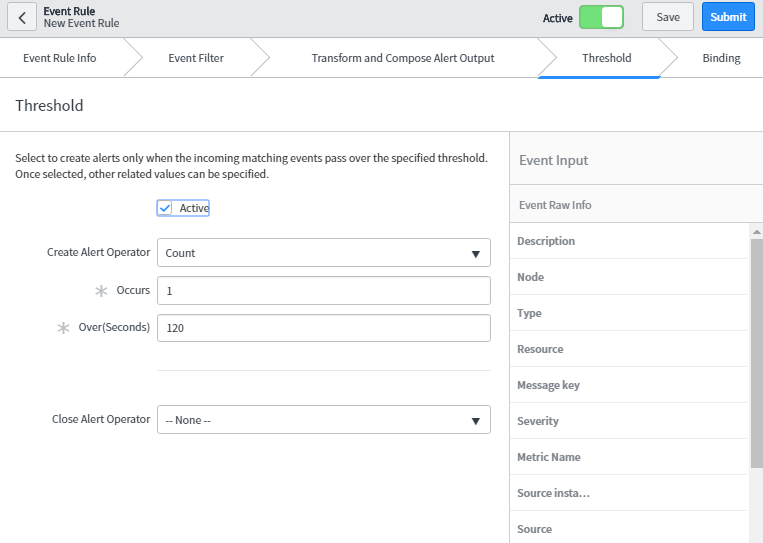
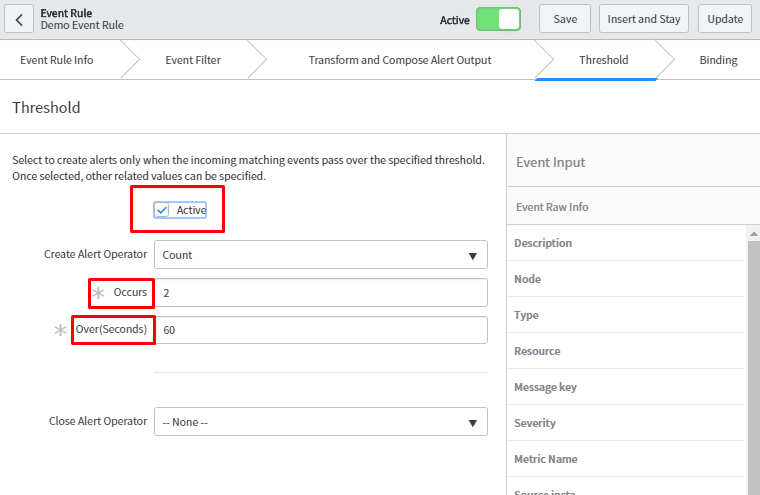
- Threshold: Threshold defines the limit using which Event Management generates the alert. We can configure the properties in these tabs to create the alert, suppress the alert generation, or close the existing alert according to threshold specified in the event field.
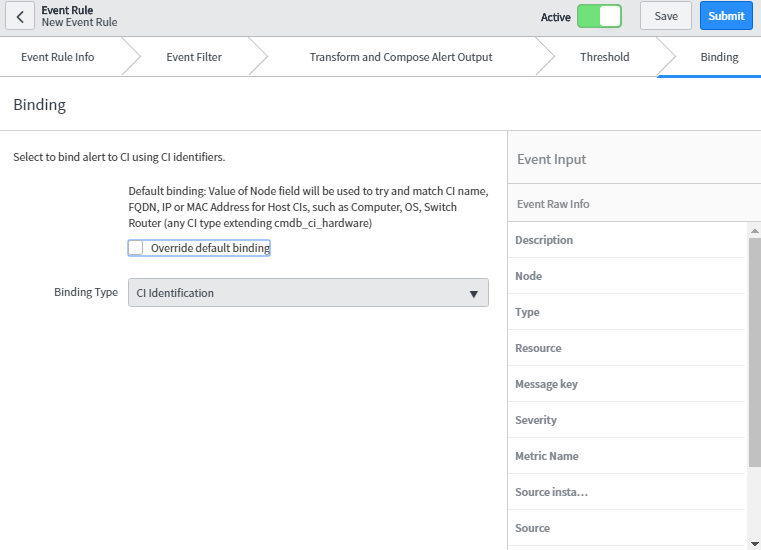
- Binding: Binding means alert can be bound to Configuration Item (CI) from Configuration Management Database (CMDB) for tracking and remediation purpose. Event Management uses event rule and various mechanism to bind CIs to alerts automatically. In default binding, node field from event matches to CI name, Fully Qualified Domain Name (FQDN), IP or MAC Address. One can also override the default binding and specify the criteria by checking override default binding checkbox.
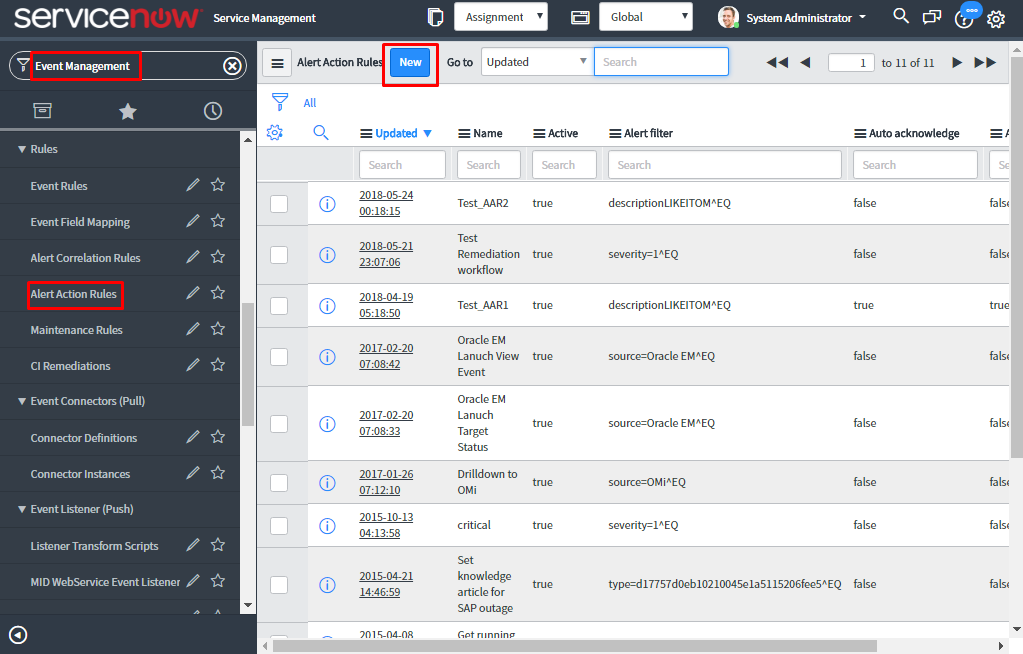
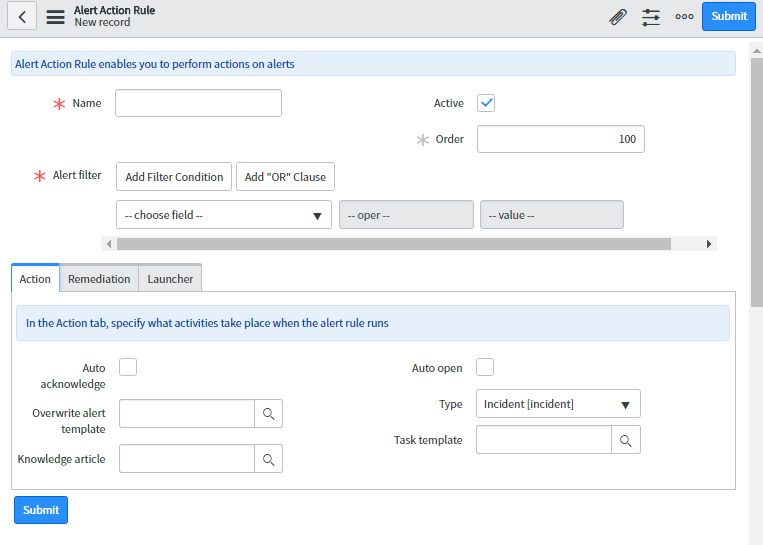
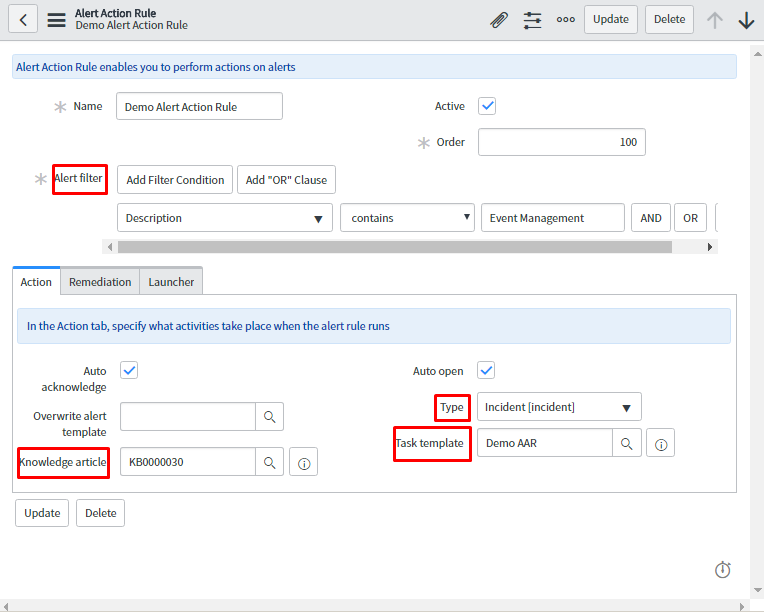
- Alert Action Rule: Alert Action Rule is applied on the alert table to have various actions on alert. This can also be grouped further using alert groups to focus the remediation on the primary alert.Alert action Rule which is applied on the alert to overwrite alert templates, attach Knowledge Base articles, adding wide variety of task (such as incident, problem), attach orchestration workflow for the remediation of the alert, and can also launch a web-based application.Navigate to Event Management > Rules > Alert Action Rules.To create Alert Action Rule, click on ‘New’.
Now, let’s check how to configure Alert Action Rule.
- Name: Specify the unique name of the alert action rule.
- Active: Select the check box to activate the rule.
- Order: Specify execution order to select one of the alert action rule when there are multiple rules. Lower the order higher the priority.
Action:
Auto acknowledge: To automatically acknowledge the alert, select the checkbox.
Overwrite alert template: To overwrite the alert template before the alert will get inserted in the alert table.
Knowledge article: To attach the knowledge base (KB) article.
Auto-open: Select to automatically open the task as specified in the type field.
Type: Type of task that must be created and attached to the alert.
Task Template: One can specify the template that assigns action to task type. It is auto populating the fields of task template.
Remediation:
- Enable remediation: To enable the remediation activity, select the check box.
- Execution: One can manually or automatically execute these workflows.
- Manual- Need to manually response the alert using the ‘Quick Response’ which is available for the alert.
- Automatic- When the alert matches alert action rule criteria then it will automatically trigger the workflow.
- Orchestration workflow: Add the workflow which will run and remediate the alert. The workflow must be on Remediation Task table otherwise it will not be available in this reference field.
Launcher tab:
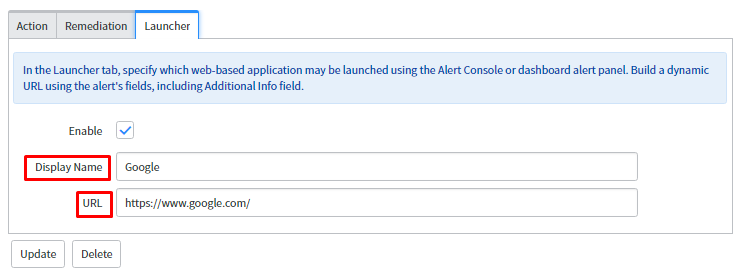
- Enable: To enable these launcher activities, select the check box.
- Display Name: The Name which should get displayed on the window when the application gets launched.
- URL: A dynamic URL which can be formed from the alerts fields or any static URL either from ServiceNow or an external URL.
Let’s achieve the above concepts with the below examples:
USECASE 1:
“When we receive two events from the same source within 60 sec then generate only one alert.”
Let’s first create the Event Rule.
As seen in the below snapshot, specify the field for the Event Rule Info tab.
Next, configure fields for the Event filter as mentioned below. When these conditions are met, it will trigger an alert as ‘Ignore’ check box is not selected.
Now, customize the alert form using transform and compose alert output tab. In the node and type field, source value is added. This means source value is visible to node and type field when the alert is generated which is mentioned later. Similarly, in this way, we can customize other form fields as well.
Next, we can specify the threshold conditions.
In this case, when 2 events occur within 60 secs then it will generate single alert.
Now, gaze the process of generating events which will further trigger the alert.
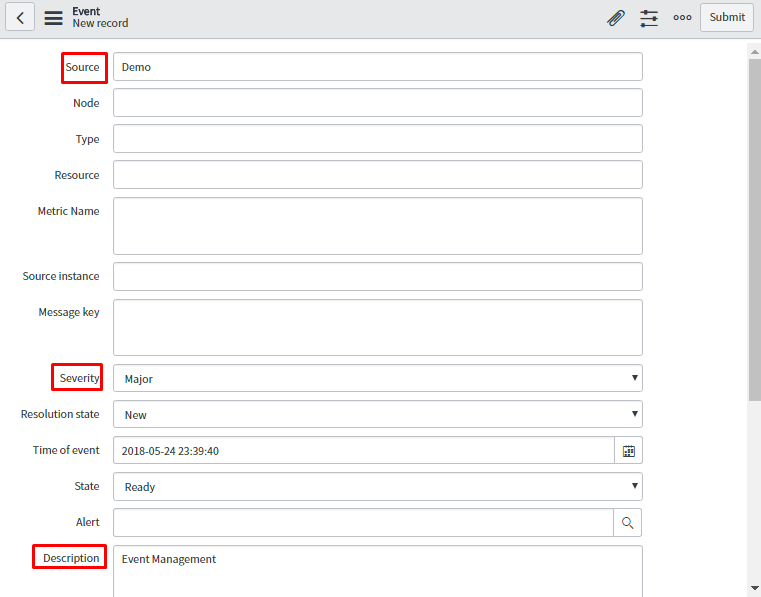
Consider below snapshot for generating the events. In the event form, one must specify the severity as it is mandatory to generate the alerts.
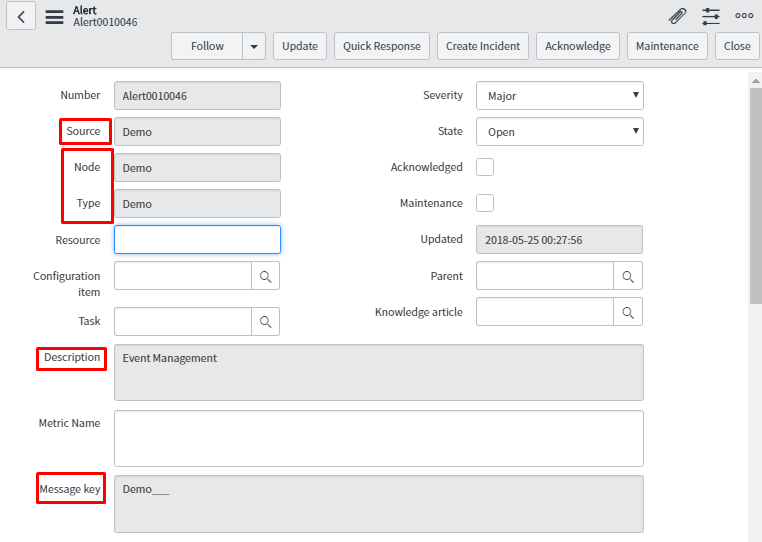
In the below snapshot, the generated alert is shown when two events get fired in the event table.
This is giving expected results as it has been configured in the transform and compose alert output tab.
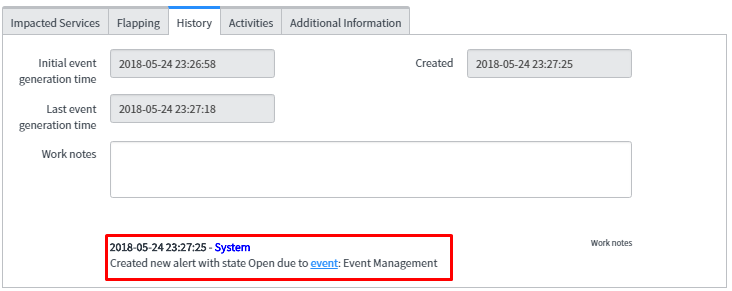
Below is the snapshot of the related tab of alert which will give extra information about the event such as which event rule is triggered to generate the alert, impacted services and many more.
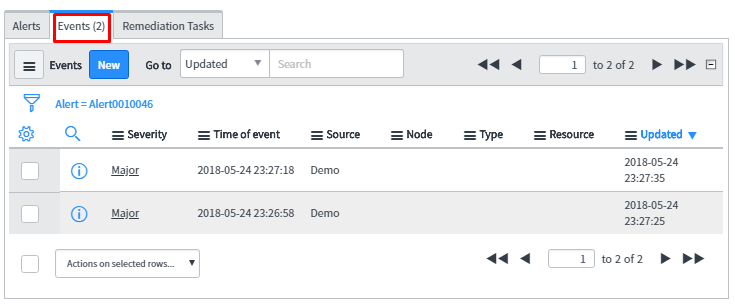
The related tab of the alert contains the information like what events are related to these alerts, related alerts and remediation task information when one has attached orchestration workflow for the remediation purpose.
As expected, the result is single alert ‘Alert001046’ generated for the two events.
USECASE2:
Implementing Alert Automation (Creating incident, attaching knowledge base article, launched a web-based application)
First, create Alert Action Rule which will be applied on the alert and perform the alert automation.
In the below snapshot, provide the condition for the alert to get triggered. In the related action tab, attach the knowledge article which will help in resolving the alert. Also, attach a task of incident type and specify the template for this task which will auto populate few fields of task as configured in task template.
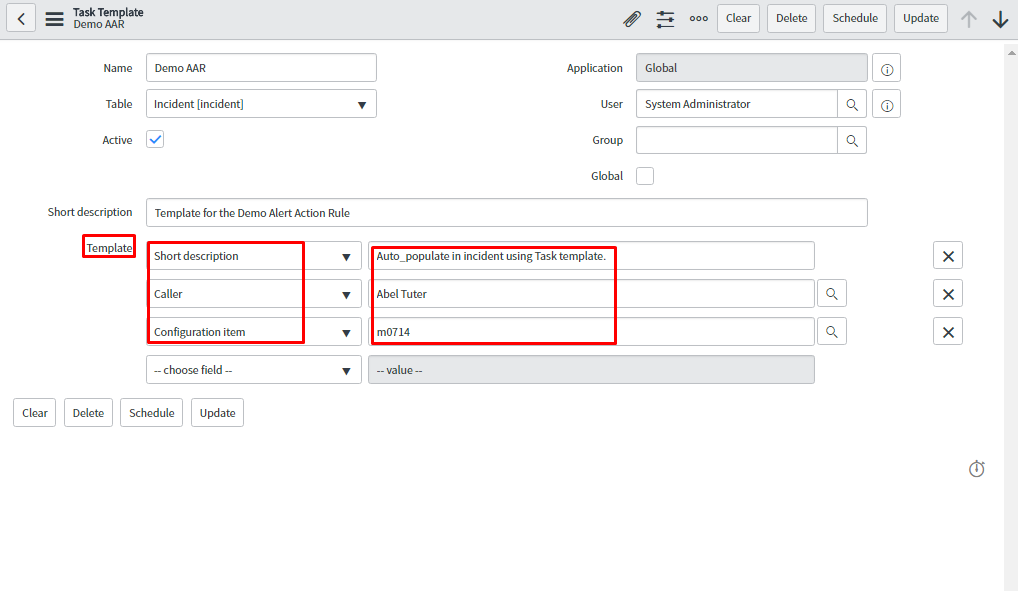
The screenshot below is the task template which is created and attached to the above alert action rule to auto populate task template.
In the Remediation tab, attach the orchestration workflow for remediation purpose. The attached workflow will restart the server and these workflows must be written on Remediation Task table.
In launcher tab, specify the URL as seen in the snapshot which will open Google URL.
To generate the alert, one has the event to be triggered in the event table which will generate alert and on that alert, it will apply alert action rule.
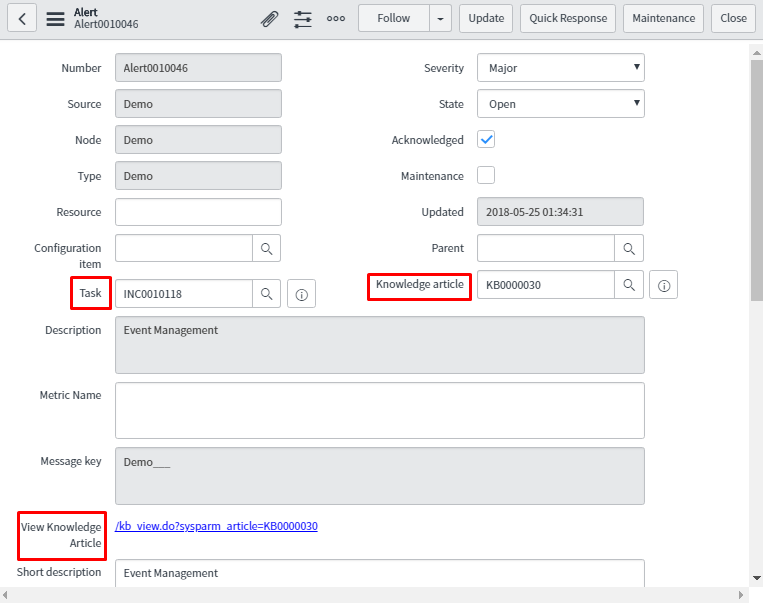
Let’s consider the event which generates the alert. Now focus on the alert form to see what changes has been reflected from above alert action rule.
Whatever configuration is done using alert action rule, the result is in alert form highlighted in the red text box.
In task, an incident is attached. In knowledge article field, a knowledge base (KB) article is attached and the link for the same is available to open this KB.
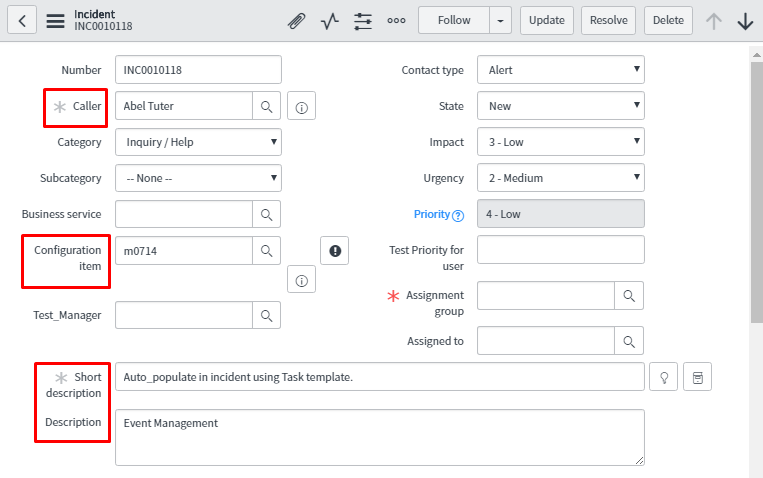
Below is the snapshot of the incident which is attached to task which auto populates with the value highlighted in the red box.
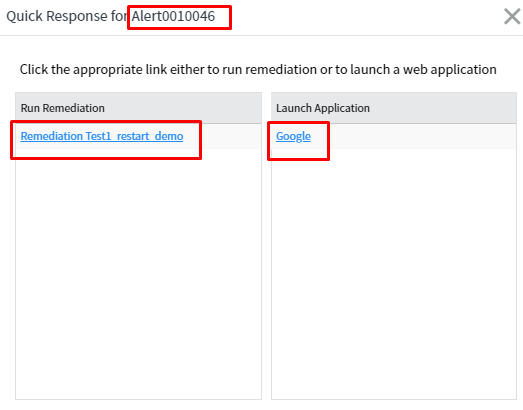
On the quick response button of the alert form, one gets remediation workflows and web-based application links.
This is process flow of how event is created, and an alert gets triggered from the event. To modify or add content or perform various actions to that alert, one can use alert action rule.
We are pretty sure that this blog will help to implement Event Management in more efficient way. Any comments\suggestions are most welcome. We have posted other blogs as well on further topics and will frequently come back with something innovative.
Explore More on ServiceNow
BROCHURE
Scale Smarter with Emergys’ ServiceNow Staff Augmentation
SUCCESS STORY
Enhancing ITSM Stability & Efficiency with ServiceNow Managed Support for an Esteemed Tire and Rubber Products Manufacturer
SUCCESS STORY
Seamless ServiceNow Transition for a Global Leader in Electronics Design and Testing Solutions
SUCCESS STORY
Optimizing ServiceNow CSM for Seamless Managed Support for a Global Analytics Company
Subscribe to our Newsletter
Subscribe to our Newsletter
Access new insights, employee stories, case studies and other activities going on in the Emergys enterprise

